 Ferndale
 Why Siding Fails Faster on Homes Near Lummi Nation
Homes in and around the Lummi Nation sit close to open water, and that changes what siding has to survive. Salt-laden air off the bay works differently on a wall than inland weather does — it accelerates corrosion on fasteners and trim metal, and it settles into any crack or seam in a siding panel long before rain ever gets a chance to. Combine that with Whatcom County's driving rain, which comes in sideways during winter storms instead of falling straight down, and you get moisture finding its way into places a siding system was never designed to handle it.
Then there's moss. Ferndale's damp, shaded conditions keep siding wet for extended stretches nearly half the year, and moss doesn't just sit on the surface — it holds water against the panel, works into seams, and keeps that section of wall from ever fully drying out. On homes close to the water, we consistently see three problems stacking on top of each other: salt-accelerated fastener corrosion, wind-driven rain intrusion at seams and penetrations, and moss holding moisture in place long enough to cause real damage underneath.
None of this means Lummi Nation homes need constant repair. It means repairs done here need to account for all three factors at once, not just patch the visible symptom.
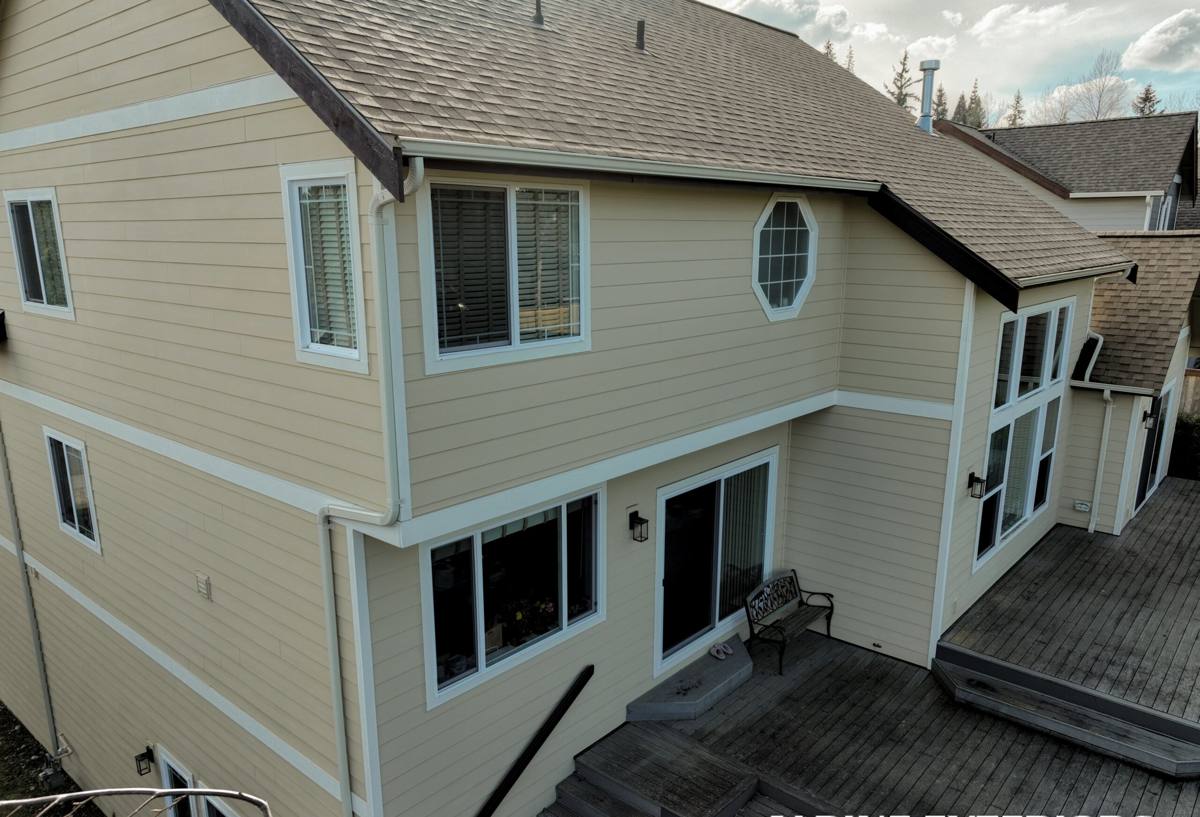
Signs Your Siding Needs Repair — Not Just a Look
Most siding problems don't announce themselves loudly. By the time damage is obvious from the street, there's usually been moisture intrusion happening behind the wall for a while. Here's what we tell homeowners to watch for:
- Panels that feel soft, spongy, or flex when pressed near the bottom of the wall or below windows
- Persistent dark streaking or green-black growth that comes back within weeks of cleaning
- Visible gaps, cracks, or separation at seams, corners, and trim joints
- Rust staining below fasteners or trim screws
- Paint or finish that's bubbling, peeling, or chalking unevenly in one area rather than across the whole wall
- A musty smell near an exterior wall inside the house, or interior drywall that feels cool or damp to the touch
- Siding that's visibly warped, bowed, or pulling away from the sheathing
Any one of these on its own might be minor. Two or more in the same area, especially near a downspout, roofline, or ground-level section facing the prevailing weather, usually means water has already gotten past the surface.
Where Damage Concentrates on Local Homes
We see the same handful of trouble spots repeatedly on homes in this area: the lower few feet of wall closest to grade (splash-back and moss both concentrate here), anywhere a deck or porch roof meets the main wall, around window and door flashing that wasn't properly lapped, and inside corners that trap wind-driven rain instead of shedding it. A repair that only addresses the panel and ignores what's happening at these transition points tends to fail again within a season or two.
What a Correct Siding Repair Actually Involves
A repair that lasts isn't just about swapping a damaged board for a new one. It requires understanding why that section failed in the first place, or the replacement piece will fail the same way. A proper repair on a home in this climate includes:
- Diagnosing the moisture path. Before anything gets removed, we trace where water is actually entering — a cracked panel, a failed caulk joint, missing or damaged flashing, or a fastener that backed out and opened a gap.
- Checking what's behind the siding. Damaged siding is often a symptom. We look at the house wrap or building paper, the sheathing, and framing in the affected area for rot or hidden moisture before closing anything back up.
- Correcting the underlying cause. If flashing was missing or a seam wasn't lapped correctly, that gets fixed — not just covered over with new siding that will fail the same way.
- Matching material and finish. Replacement pieces need to match existing profile, exposure, and color as closely as possible so the repair doesn't stand out and so water still sheds correctly at every joint.
- Correct fastening and sealing. Rust-resistant fasteners, correct nailing patterns, and sealant only where the manufacturer specifies it — over-caulking traps moisture just as effectively as leaving a gap.
- Verifying drainage. Weep paths and drainage planes have to stay open. A repair that seals everything airtight often causes more trouble than the original damage.
Skip any of those steps and you get a repair that looks fine for a season and fails again — often in the same spot, sometimes worse, because now there's fresh material sitting on top of an unresolved moisture problem.
Repair or Replace? How We Make That Call
Not every damaged section needs full replacement, and not every home needs a wholesale re-side. We look at the extent of the damage, how it's distributed across the house, and the age and condition of the material still in good shape.
| Situation | Usually Repair | Usually Replace |
|---|---|---|
| Damage limited to one or two isolated areas | Yes | |
| Damage spread across multiple walls or elevations | Yes | |
| Underlying sheathing/framing sound | Yes | |
| Rot found behind siding in more than one location | Yes | |
| Siding material is nearing or past its service life | Yes | |
| Recent siding (under 10-15 years) with isolated impact or flashing failure | Yes |
We'll tell you honestly which category your home falls into. If a targeted repair will genuinely hold up given what's driving the damage, that's what we'll recommend — a full re-side isn't the right answer just because it's more work.
How Our Repair Process Works
1. On-Site Inspection
We walk the exterior, probe suspect areas, and check trouble spots specific to this area — grade-level splash zones, deck and porch transitions, window flashing, and anywhere moss has been holding moisture against the wall.
2. Diagnosis and Straight Answer
We explain what we found, what's causing it, and whether it's a contained repair or points to something bigger. If we open a section and find the damage goes further than expected, we tell you before proceeding, not after the invoice.
3. The Repair Itself
We remove only what's compromised, address the moisture path and any hidden damage, and install matched replacement material with correct fastening, flashing, and sealant detail.
4. Cleanup and Walkthrough
We clear debris, walk the repair with you, and point out anything worth keeping an eye on going forward.
Why Local Repair Experience Matters Here
A siding crew that mostly works dry, inland neighborhoods will often treat every repair the same way — patch the panel, caulk the seam, move on. That approach doesn't hold up on homes exposed to salt air and sustained wind-driven rain the way properties near Lummi Nation are. A crew that already works this area knows which corners and elevations take the worst weather, checks flashing details that get skipped elsewhere, and doesn't guess at how much drying time a section needs before it gets closed back up.
It also matters for something less obvious: matching. Siding fades and weathers over years, and a repair patch that doesn't account for that stands out permanently. Crews who work the same region regularly get better at sourcing and blending replacement material so a repair actually looks like part of the house.
Why We Repair With — and Only Install — James Hardie Fiber Cement
When we're patching or replacing damaged sections, the material matters as much as the workmanship. We install James Hardie fiber cement exclusively, and that shows up directly in repair quality. Fiber cement is non-combustible and dimensionally stable, so it doesn't swell, cup, or warp with the repeated wetting and drying cycles that define a Ferndale winter. Its ColorPlus factory finish also holds color far more consistently over time than field-applied paint, which makes matching an older section to new material more realistic years down the line.
We don't install vinyl or engineered wood products like LP SmartSide as repair material, even as a patch. Vinyl moves with temperature swings in ways that make tight, weather-sealed patch joints difficult, and it doesn't hold up structurally against the kind of impact damage we see near grade level. Engineered wood siding is manufactured to resist moisture better than raw wood, but it's still wood-based at its core — end cuts and repair edges need diligent sealing, and in a climate with this much sustained dampness, that's an ongoing maintenance dependency we don't want a repair section resting on. Fiber cement gives a repair the best odds of actually matching the lifespan of the surrounding siding instead of becoming the next spot that fails.
Maintenance That Extends the Life of a Repair
A good repair buys you years, but a few habits stretch that further, especially given how long moss season runs here:
- Rinse siding down at least once a year, focusing on north- and shade-facing walls where moss establishes fastest
- Keep gutters clear so overflow doesn't run down the wall face repeatedly
- Trim back vegetation and tree cover that keeps a wall section shaded and damp longer than the rest of the house
- Re-caulk high-movement joints (around windows, trim) on the manufacturer's recommended schedule, not just when it looks cracked
- Walk the exterior after major windstorms and check for anything knocked loose or newly gapped
- Address small issues — a lifted seam, a hairline crack — as soon as you spot them rather than waiting for the next inspection
What Affects Repair Cost
Every home is different, but the same handful of factors drive most of the variation in repair scope and cost:
| Factor | Why It Matters |
|---|---|
| Extent of hidden damage behind the siding | Rot or moisture found behind the surface adds scope beyond the visible repair |
| Number and location of affected areas | Scattered damage across several elevations costs more than one contained section |
| Access and height | Second-story or hard-to-reach sections take more setup time |
| Material matching | Sourcing a close match for older or discontinued profiles/colors can add time |
| Flashing or trim work needed | Correcting a flashing failure, not just the siding, adds labor but prevents repeat failure |
We give a firm, written estimate after inspection — not a phone-quote guess — because the difference between a surface patch and a repair that includes hidden rot can be significant, and we'd rather you know the real scope upfront.
If you're seeing warning signs on a home near Lummi Nation, or you just want an honest read on whether it's a repair or something bigger, we're glad to take a look. Reach out for a free, no-pressure estimate using the form below.